Crafts & Cocktails

I’m back! And I’m combining my two favorite interests—drinking and crafting. Not to brag but not only is this craft directly related to drinking, I also drank an impressive amount of alcohol while making it.

I’ve been wanting to teach myself to cross-stitch for a while, especially after funny and sarcastic phrases starting getting popular. I know that “I need a drink” seems like it took as much thought as opening a beer, but it beat out about 50 other options I was weighing.

I settled on this phrase because it was funny, 95% of the time true, and nothing I would have to hide when my parents came to my apartment. Then I found this Old-English font with a stitching chart on Pinterest. The font combined with this phrase looked perfect—kinda like all these smarmy phrases showing up on old-fashioned cross-stitch projects. 

Then I made a pattern on Stitch Fiddle. This site is amazing for making your own pattern. It’s like a piece of online graph paper where you can design a color-coded pattern. It was a slow process to count out all the squares and spacing, but it’s much easier than counting the minuscule squares on the fabric. Hot tip: don’t forget to add more than one column of squares between words. This is a lesson the lack of space between “I” and “need” will never let me forget.

Overall, this was a fun project that was easy to teach myself and customize to say anything. It doesn’t hurt that the sum total of supplies was about $5.

And here’s an unrelated bonus: my gallery wall, 2.0! I’ve been busy starting a new job and moving states and apartments lately, so it feels like home again to get this back up on the wall.


My Dream Living Room

Apparently once you hit a certain age, you actually imagine what your dream living room would look like. I had never been interested in decorating until I lived in my “own” (rented) place for a few years and realized that plain walls and generic decor made me miserable. So why is my dream living room on my DIY blog? Because my dream living room simply has to be a do-it-yourself endeavor. I can’t say my current space fulfills my wildest dreams, but I love it. Yes, I actually love my small, characterless, cookie-cutter, month-to-month apartment’s living room, and that’s because I put a lot of time, effort and thought (sometimes—overthinking can be overrated) into it. And after that process, I’ve figured out that my dream living room isn’t a clear, concrete picture just yet (and it’s always changing), but it has some essential elements that, combined together, make me happy.


Something Homemade

I mean, I do have a DIY blog after all. Besides the value factor (which is awesome), I love making things for my apartment (like this pallet table!) and having something that no one else does. Even if I imitate something I’ve seen, I love knowing that no one else has the exact same item as I do. Also, if you’ve never experienced it, there is nothing better than replying “I made it!” when someone asks where you got something (Note: this also applies to clothing, but then people will ask if you’ve made everything you wear for a week afterwards.).

Something Vintage

In the above picture, the statue, wooden crate, chair, foot stool, books, stamp, and slide are all vintage. And then there’s stuff from Target and Amazon. It’s so much easier than it seems to mix modern with vintage and expensive with cheap. Just make sure everything is your style. And vintage and antique items do not have to be expensive by any means. Curated antique stores can be pricy but flea markets, rummage sales, and second-hand stores usually aren’t. Plus, vintage stuff is super unique, something that has become more important to me. I want my living room to look as good as an IKEA ad; not identical to it.

Vintage and antique accents like this also elevate a room’s look when they’re done well. With an oversized, comfy couch, I was afraid it would be hard to make my living room still look classy but adding these pieces really helps. A well-placed globe, decorative rug, or stained glass lamp can do wonders! (Arhaus has really great inspiration for how to style an elegant living room with big, cozy furniture, too!)

Something That Doesn’t “Go”

I used to worry about nailing down my colors and style. Then I realized it doesn’t matter, and I can do whatever I want. I could never decide on my color scheme, so I just bought a neutral couch and added things I like. Nothing else in my apartment was as expensive as the couch and can prettily easily be swapped out down the road. I also know nothing about period furniture so I bought whatever I liked. The same applied to my gallery wall. I know some people lay theirs out prior, but I didn’t plan a thing. I nailed up some paintings, photos, and other weird stuff I liked (like a vintage cribbage board, an old book that was turned into a clock, and a clay sculpture that I bought in El Salvador), and added to it whenever I found something else. And I love how it looks. My living room is colorful, eclectic, a little messy, but fun—just like me! No one person has just one style so why not represent everything you love?!

Something Quirky

You know when you want to buy something but have no idea where you’re going to put it? Buy it anyway. (Also maybe don’t take advice from me, because I just bought a $150 fascinator.) For some reason, this vintage slide of a cell process spoke to me. Don’t ask my why, but I liked it and bought it and had absolutely no place to put it. Now, after moving it to about 6 different places in a year, it sits on my new favorite table on some old books and it fits there perfectly. If there is a piece you love and you know it will add something to your living room (and it’s not going to break the bank), get it. You’ll find a place for it eventually.

And in case you’re wondering what my DREAM living room is, it’s something like an English library/country club/sitting room/lounge. The kind with lots of dark wood, leather, antlers, paintings of horses, and shelves of books. And yes, I will start smoking cigars on the reg when I finally have it. Also it magically converts into a Martha’s Vineyard/Cape Cod summer cottage for the warm months. You know, something simple like that.

DIY Christmas Ornaments

Well darned if I didn’t get into the holiday spirit this year! Or, more likely, looking at my sad, tiny fake tree with 5 ornaments on it was so depressing that I had to do something about it. Instead of retrieving the thousands of ornaments stashed away at my parents’ house waiting for me, I figured I’d make some more to add to the pile.

I found some patterns and ideas on Pinterest, naturally (they’re all pinned on my DIY board).

img_9039

Know anyone with two tiny hands and an even tinier head?

These tiny mittens (pattern here) and hat (steps here) just turned out so cute! And the best part was that they were so fast and easy to make (as opposed to some of my year-long adult-sized projects). The mittens probably took an hour each and the hat was even faster. These were also ideal for using up scraps of leftover yarn—I didn’t have to buy anything.

img_9041

Oh Christmas tree, oh Christmas tree, how fake are your branches.

img_9042

This one came within an inch of running out of yarn. DRAMA.

img_9043

P.S. There’s a piece of toilet paper tube under there.

I had been on the hunt at Goodwill for a Scrabble set with the original wooden letters for so long that once I finally found one, I forgot what I wanted it for. So I’ve had a bag of the letters sitting around for a couple of years, and I finally put them to good use!

img_9040

Guess which one is my favorite.

These were super easy to make. I just hot glued the letters together and glued a piece of ribbon to the back. Again, a project where I didn’t have to buy anything—hooray! The only thing I don’t love is that the hot glue can look a little goopy in between the letters, so I think if I made them again, I’d use wood glue.

img_9044

Snow day vibes.

img_9045

Be careful who you give this to. You don’t want people to think you’re calling them fat.

img_9049

It had to be done.

Merry Christmas & happy holidays (sung to the tune of the ‘N Sync song, of course)!

Gallery Wall

It’s been far too long since I posted—apologies to my follower. But now that summer/an active lifestyle is done, I am excited to get back to it! To get into the groove, I’d like to share something I’ve been wanting to post: my gallery wall. I’ve been a fan of this type of setup for awhile and have read (and ignored) lots of tips on how to create your own. And now I’m about to give you tips on how I made mine, so take that with a grain of salt.

My humble gallery wall.

My humble gallery wall.

Please note that I did not intend this to be a shrine to my own artwork but when you’re a. into painting and b. too poor for real art, it happens. Deal with it. I thought I’d mention where the pieces came from and point out some of the vintage or thirty ones BECAUSE IT’S WHAT I DO!

Ms. Foxy: Hardcore fans of my blog (JK, that’s not a thing) will recognize this as a painting I did in my last art class. End of story.

The Golden “B”: The newest addition to the wall! The letter was a few dollars at Target and I spray painted it gold and drilled a hole in the back to hang it. So easy and cheap!

Whale Cribbage Board: A favorite of mine from a local vintage store.

My Passport: Six pages of my passport, separated and framed with a custom-cut mat. Hint: if the coolest stamps are on back-to-back pages, a color copy looks just as good.

My Dad’s Army Photo: My favorite picture of him, because I think he looks like a movie star.

Gold Framed Oil Painting: An original painting of Paris that I got at my favorite antique store by my cabin. Super inexpensive for an original anything.

Mask: A tiny little mask I picked up while volunteering in El Salvador that cost a couple bucks.

Dog painting: My beloved dog Bailey, painted by me.

White Framed Watercolor: This is a painting of the Mirabell Gardens in Salzburg, Austria that I bought from a street artist in the same location.

Eiffel Tower Painting: Another one I did in art class. This one is a copy of another painting.

Wooden Framed Mountain Painting: A painting I did from life (is a mountain alive?) while in Seward, Alaska at a plein air painting weekend.

Silver Framed Boat Painting: Another from the same Seward plein air weekend with a frame from a thrift store.

Vintage Book: A vintage book made into a clock that I bought at a flea market in Brooklyn.

My Humble Advice and Tips:

  1. Mix and match everything. Gold and silver. Black and brown. Homemade and purchased. Photos and other media. Some people go with all photos or all black frames which can look really great, but I love the unmatched look of my wall (and I think it fits my apartment).
  2. Don’t think you have to spend a lot. The most I spent on anything on this wall was probably getting the custom mat for my passport, which was not all that much. Homemade art can look really nice!
  3. Include three-dimensional stuff along with two-dimensional art. It really adds another, well, dimension to the wall. Consider hanging things that aren’t normally meant to be hung. I had to nail a wire to the cribbage board to hang it up, but it’s one of my favorite parts of the wall (and since I don’t know how to play cribbage, no big loss).
  4. Search thrift stores for picture frames. Those can often be the most expensive part, but places like Goodwill are overflowing with them for cheap.

A Pink and Gold Vintage Cocktail Party

It all started with a Facebook article about the lost art of the cocktail party. So I decided to bring it back. And basically start a revolution. Definitely not just and excuse to dress up and have cocktails.

If you’re thinking these pictures look a lot better and more flattering than the normal crappy iPhone ones, you’re correct! One of my best friends and party guests just so happens to be a talented photographer and designer, too! Check out her company, Clark Creative! It’s awesome.

So without further ado, my first annual hello to summer cocktail party.

On my bar cart below, the decanters, pitcher, sign, lamp, and jigger are all antique/vintage. I used a lot of pink and gold candies to decorate for the party. It was an inexpensive and edible way to carry the theme all over my apartment. Plus, it looked pretty!

bridget-cocktail-party-001

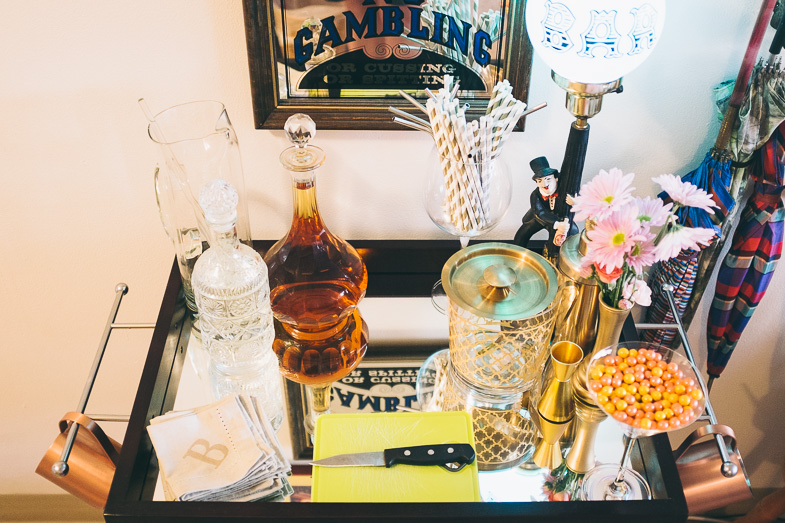
Here’s a glimpse of my bar cart, actually made functional for once!

The other main piece I used to establish the theme colors were flowers and vases. Again, it’s an inexpensive, pretty way to add color and life to the party. I spray painted four thrift store vases in different shapes, patterns, and heights gold to make a mismatched set go together but still be unique.

bridget-cocktail-party-002

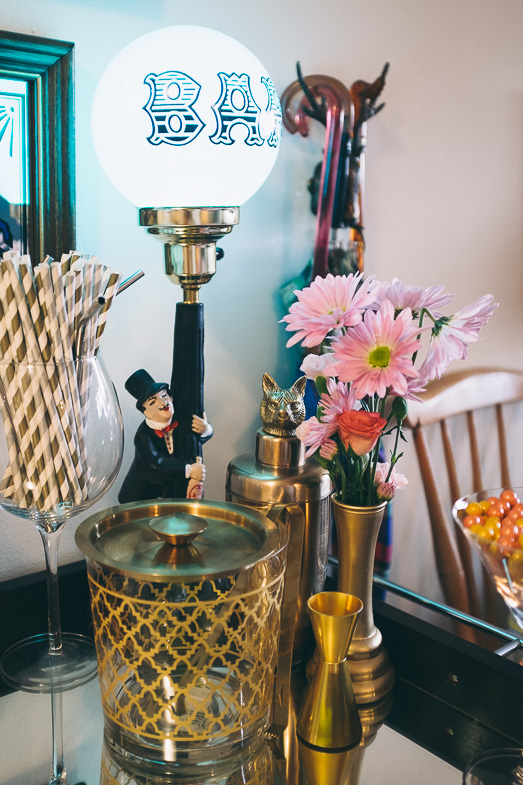
Some of the details on my bar cart. Can you tell I love gold?

bridget-cocktail-party-008

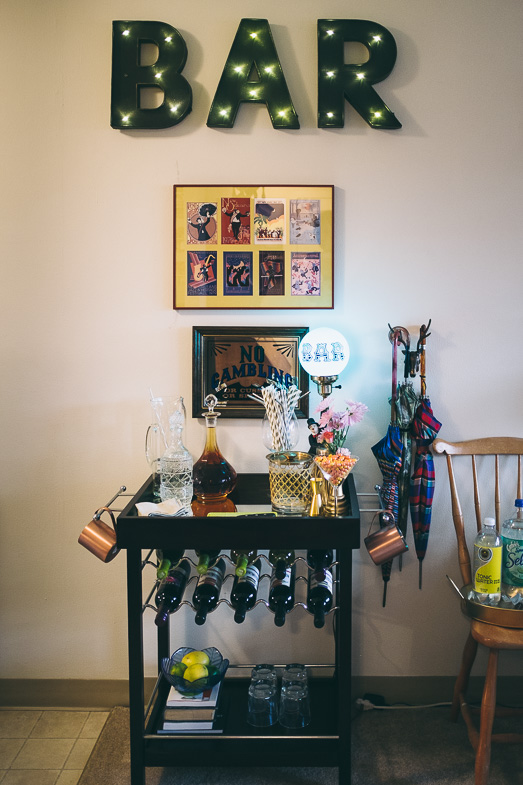
I’m just so passionate about my bar cart, I had to get a sign to announce it!

Here’s the thrift store tray I spray painted gold and recently blogged about (here if you missed it). Since I’m short on extra space and table room, I made a makeshift mixer table by setting the tray up on a chair. The cocktail tools are vintage.

bridget-cocktail-party-003

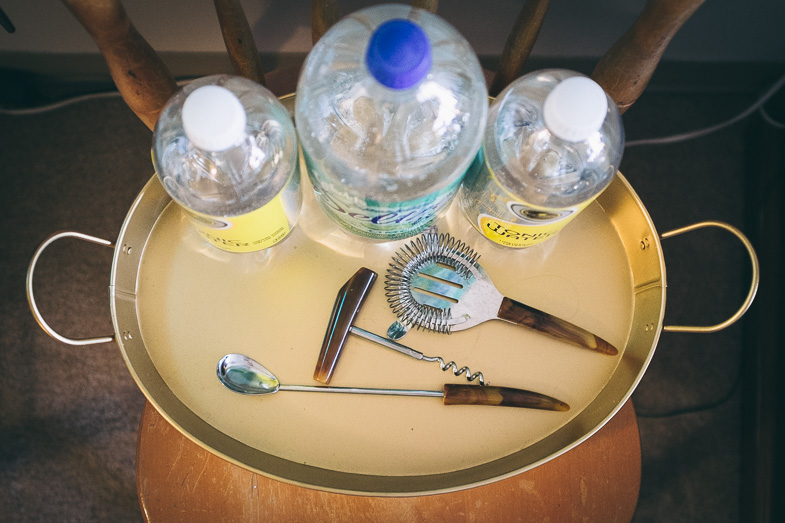
Does the tray look familiar?

I think the candy (or gum balls in this case) in martini glasses really makes for a fancy decoration! I’ll definitely use this trick for my next party. (Plus, I get to eat the leftovers!) Paired with another gold vase with pink flowers, the color scheme spreads to all corners of the room.

bridget-cocktail-party-006

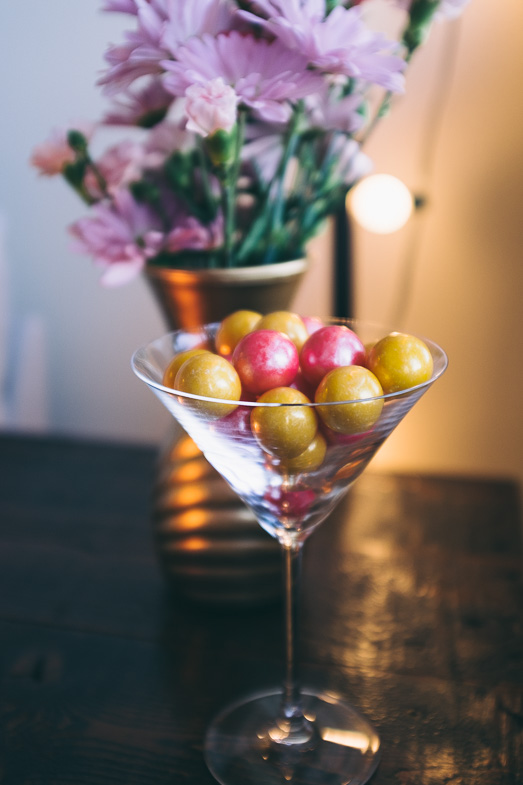
Pink and gold all over the place.

Pretty cupcakes are another thing that can be used as a decoration and a snack. I made these strawberry lemonade cupcakes with lemon cake, strawberry frosting (piped on with a cookie decorating set), and a lemon drop on top, just in case you don’t get the clever theme. Also…they’re pink and yellow which is so close to pink and gold!

bridget-cocktail-party-004

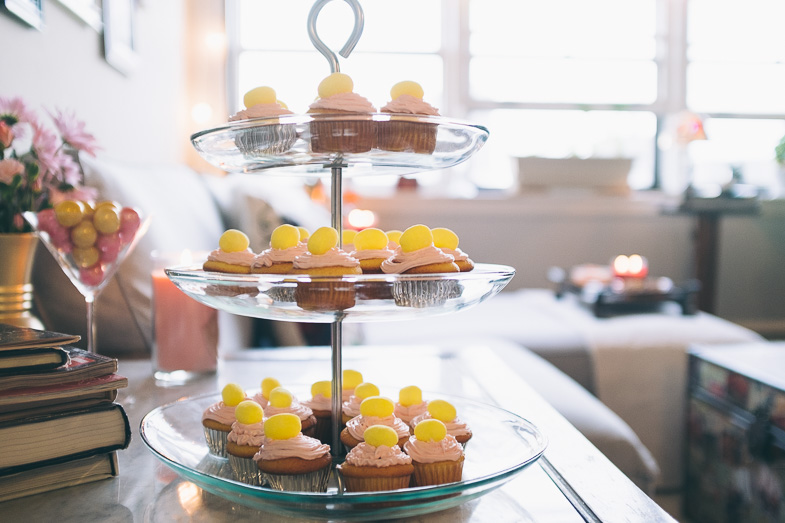
It’s not every day I get to break out the tiered serving tray! In fact, it’s been two days, ever.

Now for what’s really important—cocktails! This drink was a hit! Of course I wanted something pink so I decided to make a champagne cocktail. I blended a few different recipes to make my own. I used champagne, strawberry kiwi juice, strawberry vodka, and strawberries to make a lovely, bubbly, pink concoction. It was a hit, if I do say so myself. And of course, another gold vase with pink flowers and the champagne glasses that I decorated with gold paint.
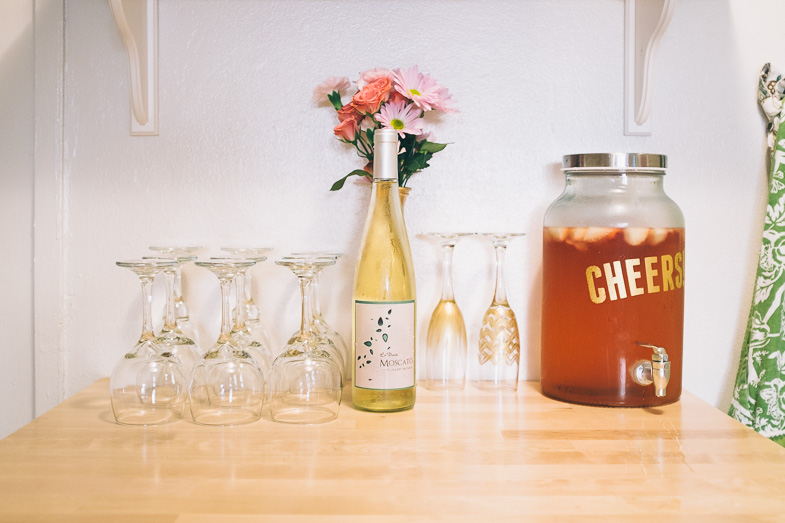
bridget-cocktail-party-013

Cheers!

Nothing on this cheese platter is pink or gold (well, that sausage might be considered pink), but it just looks so darn delicious. While fancy cheeses are pricey, this is a party located in Wisconsin, so it’s always worth it.

bridget-cocktail-party-018

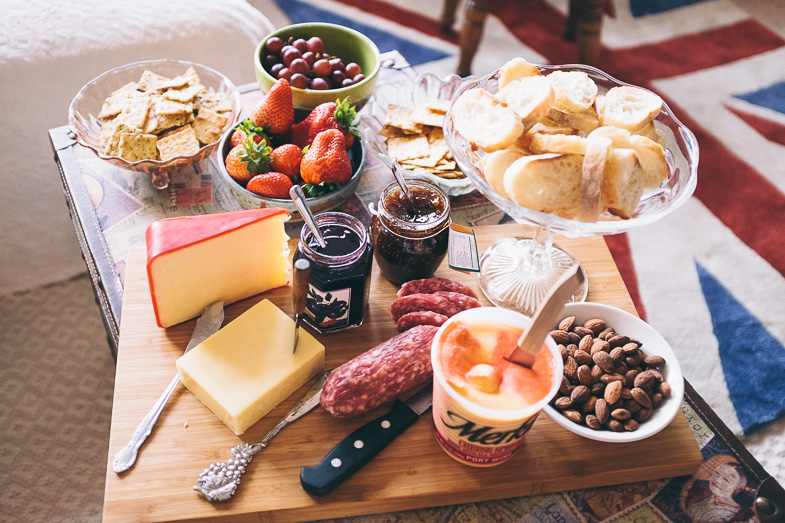
What a dream come true. Just me?

And here’s a look at my apartment living room, all ready for a party! I can’t decide if leaving the lights up year-round is trashy, but I just love the soft light they gave to my cocktail party (and I’m obviously too lazy to take them down at this point).

bridget-cocktail-party-007

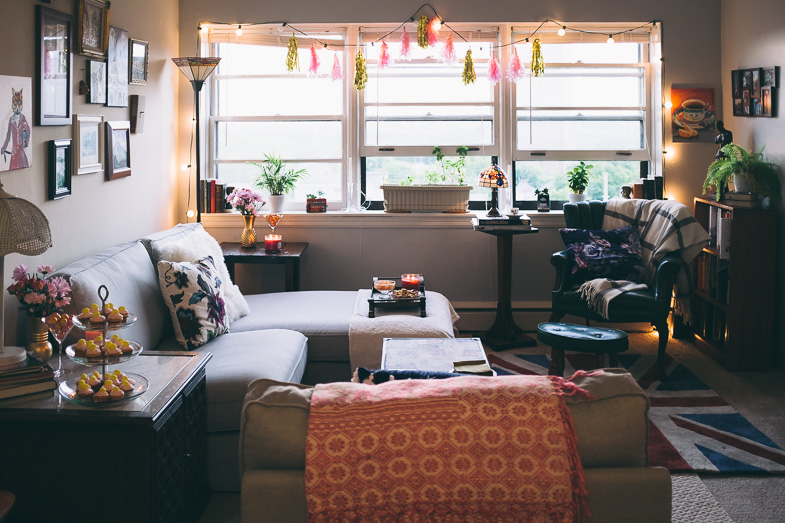
Home sweet home. But 100x cleaner than normal.

And I couldn’t resist including this one because I have to show off the outfit I wore! This is a cream vintage dress with orange polka dots that I picked up in Alaska. I also got a chance to pull out the pearls, which is rare. So that’s my party. Now, please, leave me alone so I can sit here staring out the window, drinking champagne in high heels, like I always do.
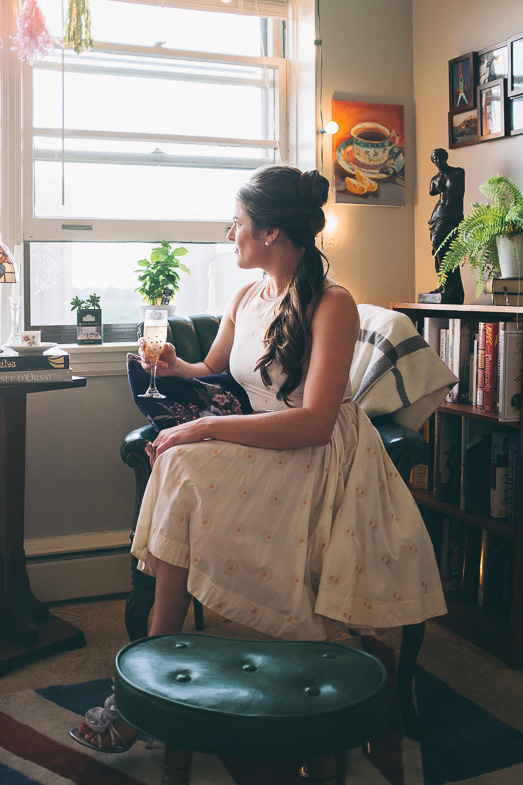
bridget-cocktail-party-016

Standard Wednesday.

The Weekend Antique Haul: Up North Edition

A Memorial Day weekend at the cabin is just not complete without a visit to one of my favorite antique stores ever. Saturday was a lovely day so Mom and I made the excuse of obtaining rations and went to Cranberry Creek. I was on the hunt (as I remembered once I saw this) for pink dishes in preparation for my upcoming pink-and-gold-themed cocktail party and found this pink depression glass dish.

image5-3

Pink depression glass dish.

It’ll be perfect for candy and to establish the color scheme throughout my apartment, but the pink is subtle enough that it can be used any old time (since my life is basically a vintage- and pink-themed cocktail party). This delightful bowl was only $7.95.

image4-4

Check out those depressions! Also, someone please teach me what depression glass is!

The next object fits the definition of “I didn’t know I needed it or it existed until I saw it”. It also fits the definition of “I still hardly know what this is, but I love it nonetheless!” (In my defense, my mom bought a noodle drying rack. Hopefully I never have to actually use this defense.) This little sucker is a slide of the steps of mitosis (see also “science”), so it’s a learning tool as well. The slide looks a little blurry but it’s not me; it’s just how the drawings are! I really have no idea where this would have been used or what kind of device it would have been used in, so if anyone can shed some light, please do. And if you’re like “she bought this thing that she doesn’t even know what it is”, you can shut your mouth because it was a STEAL at $5.95.

image3-3

I

Antiquing sure tired me out, so I had to take an overnight break. The next day, Sunday, was a rainy day, so it was the perfect time to go to another antique store. (If you haven’t picked up on it yet, every day is the perfect day to go to the antique store.) Luckily, the antique stores saved the best for last! This is the mug of my dreams. It will be perfect to hold pens, pencils, letter openers, and various antique riff raff on the writing desk that I am currently curating. It’s also another learning item, so I think I can write if off on my taxes or something. It was $11.95 and I would have paid a million dollars for it.

image1-12

I’m obsessed with this mug.

All in all, an extremely successful weekend of antiquing! I just cannot wait to incorporate my new treasures into my apartment with never-ending space for objects. And, just for fun, here’s a bonus find that I got for free (FREE!!) at a rummage sale up north.

IMG_4454

The hat may have been free, but the discomfort it caused my parents is priceless.

The Weekend Antique Haul

Oops, I did it again! The funny thing about saving money and not antique shopping is that it’s impossible. Oh well. At least I have cool stuff! Here’s what I found last weekend at my friendly, neighborhood antique store.

IMG_43841

Find #1: A decoratively etched bottle.

Of course I couldn’t take a trip to the antique store and neglect my precious bar cart. Big decanter, meet your new baby sibling! I don’t want the big decanter to get jealous, but the new one is pretty fancy. The search for a different style to complement the round, squat one had been going on for some time, and I think the intricacy of the new one is the perfect fit.

IMG_43851

Welcome to your new home, decanter!

The second find of the day was a time stamp, in the literal, non-electronic sense. Not that I’ve been looking, but I’ve never seen a stamp like this before. The rubber part on the bottom turns with a clock-like dial on the metal part, so one can literally stamp the time on…whatever (I’ll figure that out later).

IMG_43861

Find #2: A time stamp (next to my treasured wax seal).

The real purpose of the stamp is to kick off the theme of my secretary which I hope to style as a vintage writing desk—time stamp and all! (I can’t remember a day I wrote when I didn’t reach for my vintage time stamp.) It’s going to be hard to use this surface for good instead of evil (junk mail) but the stamp and pencil holder are a good start.

IMG_43871

The stamp situated on my secretary desk.

Oh, and best of all. The total for both items? $25

Urban Gardening

That’s right folks—my green thumb is back! What that means is I’ve purchased pre-grown plants from the store and have made a commitment to them, myself, and all of you to try to keep them alive for a while. The weird thing about doing gardening as simple as replanting when you live in an apartment building is that you don’t really have access to dirt. So I took a mixing bowl and, under the cover of night, snuck a few scoops from the front “yard” (about five square feet of grass) of my complex. Don’t tell my landlord.

image1-11

I got the idea on Pinterest to reuse tea tins as planters. And since I had a few English teas in cute tins lying around, I bought a couple of ADORABLE and tiny succulents to fill them! Plus, I, of course, love the British decoration of the tins. Here are two succulents sharing a home in a double-decker bus tea tin. (I’m hoping the sparse one recovers after being dropped on its head.)

image6-2   And here’s a solo plant in an English breakfast tea tin.

image3-2There have got to be tons more things you can do with these tins, but I haven’t come up with any other ideas yet. Anyone have some? Just in case, I better keep drinking tea.

Mod-Podge Paris Tray Table

This post has been a long time coming, which is not really excusable for how simple the project was! My favorite part is how cheap it was too. I picked up this little tv stand at an estate sale last summer for no more than $2. The idea was to mod-podge some cool paper on top of it, paint the legs, and make it a fun little side table. I toyed with the idea of mod-podging (which I had previously referred to as “hodge podge” and “modge podge”, both of which I learned don’t exist) some actual objects onto the top of it (i.e. postcards or pictures) but once I found this paper, I figured it did the work for me. I picked this up at a store in Minneapolis that’s hard to describe other than it has lots of fun STUFF. I’m loving these papers! A few bucks each but tons of styles and they’re thick and sturdy enough to use for all kinds of projects. I’ll definitely have to find more ideas as I’ve found these at an art supply store near me.

Anyway the mod-podge was probably the most expensive part of the project. It nearly broke the bank at $7. I pulled the tray piece off the legs and shellacked that paper onto the tray with a good 5 or 6 coats. It created a nice thick coating but I think I’ll still need to be careful not to get it wet or spill on it (not my strong suit). One issue I had was getting the paper tightly fitted into the curved corners. If you look closely (please don’t), the paper ripped in one corner and kind of stretched over another so it doesn’t fit in tight. Better luck next time. I did find that getting the paper and the tray pretty soaked in mod-podge first helped with the pliability. I threw about 4 coats of gold craft paint on the legs with a foam paintbrush and ta-da!

Total cost (estimated):

  • Table – $2
  • Paper – $3
  • Mod-podge – $7
  • Gold paint – $3

For a grand total of only about $15! Not bad. I’m still undecided on how much I like this. It’s definitely a handy size and height for my living room but probably not something I’ll move into a decent house one day. It works with my small apartment and mismatched decor for now though. What do you think? Cute or cheap looking?

IMG_20130325_131141

Here’s the festive 70’s tv tray before. I know, I can’t believe I would cover those fetching ribbons up either.

IMG_20130325_131107

View from the top. I’m kind of obsessed with Paris and fell in love with the paper. I think the angled placement worked out too.

IMG_20130325_131034

Painted the legs gold. Took a few coats but I like how it turned out.

My First Statue

Summer means an inordinate amount of popsicles, spending a lot of time in front of fans and air conditioners and venturing outside to estate sales! If you have not experienced one of these yet, you’re missing out. With much more stuff than rummage sales, you’re much more likely to find a hidden gem (or that much more crap). Sometimes you can tell right when you walk in the door that this is not the sale for you but I found a pretty interesting one recently. Whenever you see Greek/Roman-looking busts on sale for $300, you’re probably in for an interesting experience, if nothing else.

In all her glory

In all her glory

Luckily I showed up on the third or fourth day of the sale when everything was 70% off (!). (This happens a lot after the first day or two of an estate sale.) I happened upon this Venus di Milo statue and it was just too cool and quirky to pass up. At about $30 originally, I picked it up for $10 (and an off-white wool beret!). All dusted-up, I think it fits in well in my little corner with the other dark brown wooden accents.

Accepting name ideas for the statue.  I think she needs to dress up for each holiday.

Accepting name ideas for the statue. I think she needs to dress up for each holiday.